Set Up Invoicing Preferences
Here's how to set up (or change) the preferences and defaults related to the various invoicing functions in the system.
From the Lynx Main Menu . . .
1. Left-click on Bookkeeping and a drop down menu will appear.
2. Left-click on Accounts Receivable.
3. Left-click on Invoicing.
4. Left-click on Invoicing Preferences.
5. This will display the Invoicing Preferences window.
6. You should be on the  tab by default.

Left-click the down arrow  and a drop-down list
of your Chart of Accounts will be displayed. Left-click the one you want to use for your payment
deposits.
and a drop-down list
of your Chart of Accounts will be displayed. Left-click the one you want to use for your payment
deposits.

This must ALWAYS be account number 1100. It's used to keep a running total of the amount you have billed
your customers but not yet collected. If account 1100 is not already selected, left-click the down arrow
to display a list of your Chart of Accounts and
then left-click on account 1100.

Left-click the down arrow and a drop-down list
of your Chart of Accounts will be displayed. Left-click the account you want to use to keep track of
your discounts allowed.

Left-click the down arrow and a drop-down list
of your various invoice formats will be displayed. Left-click on the one you want to use for printing
invoices from an Invoice batch.

Left-click the down arrow and a drop-down list
of your various Service invoice formats will be displayed. Left-click on the one you want to use for
printing service invoices from a Service Invoice batch.

Left-click the down arrow and a drop-down list
of your various Service Order formats will be displayed. Left-click on the one you want to use for
printing Service Orders.

Left-click the down arrow and a drop-down list
of your various Gas Meter invoice formats will be displayed. Left-click on the one you want to use for
printing Gas Meter invoices.

Left-click one of the radio buttons to choose which option is automatically displayed when you're trying to "Find a Customer" in any of the invoicing functions. In this example, "Street Name" has been chosen as the default (which means it will automatically come up with Street Name selected). By the way, this preference is different than the "Find a Customer" preference used for "Customers" which is set up in Company Preferences.

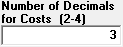
Use these fields to enter in the number of decimal spaces you want for your prices and for your costs.
| # of Decimals | Example |
|---|---|
| 1 | 1.9 |
| 2 | 1.99 |
| 3 | 1.992 |
| 4 | 1.9925 |

Left-click the appropriate radio button to choose whether or not you want the system to automatically give you the ability to add a tank if there is no tank assigned to an account on a delivery invoice.

Left-click the down arrow to display a
drop-down list of the sequences your payment batches can be printed in (Account #, Invoice #,
or in the Order Entered). It is preferable to select "Order Entered" since this makes finding errors
much easier if there's a problem entering payments.

Left-click the down arrow and a drop-down list
will appear. Left-click on the sequence you want your invoices to print.

Left-click the appropriate radio button to choose whether or not you want the system to automatically increment the Invoice Number when you're entering invoices.

Left-click the appropriate radio button to choose whether or not you want the system to automatically tab to the Purchase Order # text box when you're entering invoices.

Left-click the appropriate radio button to choose whether or not you want the system to automatically tab to the Date text box when you're entering invoices.

Left-click the appropriate radio button to choose whether or not you want the system to automatically tab to the Delivery/Serviceman text box when you're entering invoices.

Left-click the appropriate radio button to choose whether or not you want the system to check the dates associated with any invoice batch. If you check "Yes", the system will make sure that the Default Invoice/Ticket Date is within the Period selected for the batch. If you check "No", this check will not be done. However, it is strongly suggested that you leave Date Error Checking turned ON. If you are using the General Ledger part of the system, you MUST have this turned on.

If you left-click "Yes", the system will automatically use your default product costs on all sales. If you left-click "No", all costs will be set to zero.

Select "Yes" if you've made a custom invoice you would like to use with Lynx. Select "No" to use the default.
7. Left-click on the  tab.
tab.

Key in any message you want to appear on all of your invoices.

Here you can key in a number representing the lowest balance an Invoice can have and still be printed. If you want all balances to print, it's important you leave this blank.

This applies to the "8.5 x 11 Plain paper letter head" invoice only. If you select "Yes", individual taxes will show for each line item on the invoice as well as a Tax Total at the bottom. If you select "No", only the Tax Total will show.

If you select "Yes", Individual unit prices will show for each line item on the invoice. If you select "No", individual unit prices will NOT show, only the extended Amount will show for each line item.

By selecting "Yes", only those products included in the Default Product Group selected above will be shown in the drop-down list. If you select "No", the drop-down list will include ALL of your products.

Select the Product Group that includes the products that are most often used when keying in delivery invoices. This is typically "1 Propane". If you then select "Yes" in the "Use Delivery Invoice Filter" (see above), ONLY those products associated with this Product Group ("1 Propane" in this example) will be shown in the drop-down list. This makes selecting the product much faster than if you had to wade through all of your products in the drop-down list.

If you want to print invoices from a delivery batch, select the format you want to use from the
drop-down list that is displayed when you left-click the down arrow .
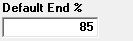
This percent is used by the system when scheduling deliveries. It is the assumed ending percent after a tank is filled. Normally this is set at 85%.

Select whether or not you want the tank serial number to print when you're using the plain letter head invoice format.

If "Yes" is selected, a text box will be displayed when you're entering delivery invoices that allows you to specify if the tank needs paint or not. This is typically determined by the driver who indicates it on the delivery ticket.

If "Yes" is selected, the default price will automatically be displayed when entering invoices. This will significantly reduce the number of key-strokes you have to enter and save you a lot of time.

If "Yes" is selected, invoice numbers will not be able to be changed. If "No" is selected, then invoice numbers can be edited.
8. Left-click on the 

Left-click the down arrow to select the format
you want to use for your delivery tickets. By the way, whichever format you select will apply to tickets
printed from an individual account as well as tickets printed from the Options button on the Add,
Change, Delete Routes window.

If "Yes" is selected, the default price will be shown on the Lynx Truck Ticket. This applies whether they are printed from an individual account or printed from the Options button on the Add, Change, Delete Routes window. If "No" is selected, the default price will not be printed.

If "Yes" is selected, either KF (for Keep Full) or WC (for Will Call) will be shown on the Lynx Truck Ticket. This applies whether they are printed from an individual account or printed from the Options button on the Add, Change, Delete Routes window. If "No" is selected, neither KF or WC will print.

If "Yes" is selected, the Pre-buy (PB) gallons left will be shown on the Lynx Truck Ticket. This applies whether they are printed from an individual account or printed from the Options button on the Add, Change, Delete Routes window. If "No" is selected, the Pre-buy gallons left will not be printed.

If "Yes" is selected, the Terms will be shown on the Lynx Truck Ticket. This applies whether they are printed from an individual account or printed from the Options button on the Add, Change, Delete Routes window. These are the terms that are selected for each customer under Account Preferences. If "No" is selected, the Terms will not be printed.

If "Yes" is selected, the Delivery History will be shown on the Lynx Truck Ticket. Included will be date, gallons delivered, and the ending percent for the last five deliveries. This applies whether they are printed from an individual account or printed from the Options button on the Add, Change, Delete Routes window. If "No" is selected, the Delivery History will not be printed.

This applies only to the DELIVERY98 On-Truck system. If checked, temperature compensation calculations will be used. If "No" is selected, no temperature compensation will be used.

If "Yes" is selected, the Price or Price Code Code will be shown on the Truck Ticket printed from the Mid-Com SLS using the DELIVERY-LYNX On-Truck System. If "No" is selected, it will not be printed.

If "Yes" is selected, the Tax Rate left will be shown on the Lynx Truck Ticket. This applies whether they are printed from an individual account or printed from the Options button on the Add, Change, Delete Routes window. If "No" is selected, the Tax Rate left will not be printed.

If "Yes" is selected, the Route ID will be printed on the Lynx Truck Ticket. This applies whether they are printed from an individual account or printed from the Options button on the Add, Change, Delete Routes window. If "No" is selected, the Route ID will not be printed.

This applies to the Delivery Lynx On-Truck system ONLY. If "Yes" is selected, the Ship to address will be used. If "No" is selected, the Billing address will be used
6. When you're done, left-click the close button  to return to the Lynx Main
Menu.
to return to the Lynx Main
Menu.