Print Custom Customer Letters
Occasionally you may want to send special "customized" letters to all (or some) of your customers. This might be for such things as welcoming new customers, notifying disconnects, or announcing new products and/or services.
Note: These custom letters are in addition tobudget reminder letters and custom 30/60/90 day letters.
This is a two step process. The first step is to decide on the kind of letter(s) you want to send and the text for each. The second is to actually print the letters using the filters to select the customers you want to send to.
Setting up your custom letters
From the Lynx Main Menu . . .
1. On the Menu Bar, left-click on Reports and a drop-down menu will appear.
2. Left-click on Customer Reports and the Choose a Customer Report window will appear.
3. Double-left-click  .
.
4. This will display the Format a Customer Report window for custom customer letters.
5. Left-click the  button and the Choose the text you would like to use window will appear.
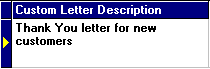
6. Key in the description of the custom letter in the text box provided. For example:
7. Double-left-click in the Custom Letter Text box:
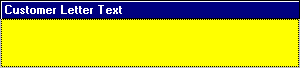
8. This will display the Customer Letter Text window.
9. Key in the text of the letter (click here for an example) and then left-click the  button..
10. If you want to add another letter, left-click the  button and return to step 5 above.

You don't have to worry about anything other than the body of the letter. The system will automatically insert the date, customer name, and salutation for you.

Sending out your custom letters
From the Lynx Main Menu . . .
1. On the Menu Bar, left-click on Reports and a drop-down menu will appear.
2. Left-click on Customer Reports and the Choose a Customer Report window will appear.
3. Double-left-click .
4. This will display the Format a Customer Report window for custom customer letters.
5. If you want the letter to only be sent to selected customers, use the filters to extract the ones you want. If you need help on this, see How Filters Work.
6. Once you've made your filter selections, left-click the  button.
7. This will display the Choose the text you would like to use window showing all of the letters you have set up so far.
8. Left-click on the letter you want to print.
9. Left-click the  button.
10. After your letter has appeared on the Print Preview window, you
can left-click the print button  to print the
letter(s).
to print the
letter(s).
The letters will automatically be formatted so that the customers name and address fits in a standard business window envelope.
Miscellaneous functions . . .
For help on changing an existing custom letter, click here.
Changing an Existing Custom Letter
To change an existing custom letter:
1. Go to the Format a Customer Report window.
2. Left-click the button.
3. Double-left-click in the Custom Letter Text box you want to change.
4. Make your changes.
5. Left-click the
button.
For help on deleting a custom letter, click here.
Deleting an Existing Custom Letter
To delete an existing custom letter:
1. Go to the Format a Customer Report window.
2. Left-click the button.
3. Left-click the letter you want to delete.
4. Left-click the  button.