Pay Vendor Bills
This is typically the second step in handling your Accounts Payable and is done after you have entered your bills (See Find a Batch of Vendor Bills or Add a Batch of Vendor Bills for help on this.)
This procedure involves getting the bills you entered earlier, selecting the ones you want to pay, and printing the checks.
From the Lynx Main Menu . . .
1. Left-click on Bookkeeping and a drop down menu will appear.
2. Left-click on Accounts Payable and then left-click on Add a Vendor Bill Payment Batch.
3. This will display the Enter Payments to Vendors window.
4. Select the "Employee Responsible for this Batch" and make sure
the Period date is correct. Then left-click on the  tab.
tab.
5. Left-click the  button and then left-click Choose Vendor Bills to Pay.
This will display the Pay Vendor Bills Due window.
6. Select the bills to be paid:
-
Check
 the Vendor bills to be paid in the
  column and/or . . .
-
Select a date in the
 box. All
bills with a "Due Date" of that day or earlier will be displayed.

Left-click the
button to display your current balance for the Bank Account selected.
Left-click the
button to display the total amount of the bills you've selected to be paid as well as the bank balance remaining after these payments are made.

7. After you've selected the bills to pay, left-click the  button. The system will now calculate
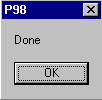
the bills to be paid. When completed, this window will be displayed:

8. Left-click the OK button. Then left-click the close button  to return to the Enter Payments to
Vendors window.
9. Left-click the  button and then from the drop-down list do the following:
- Print the batch report by selecting Print Batch Report and/or . . .
- Print the Vendor checks by selecting Print all Checks in this Batch.
10. When you're all done, left-click the  tab and POST this batch to the General Ledger. Then
left-click the close button
  to return to the Lynx Main Menu.